This step-by-step guide outlines how to properly position your seat on a Schwinn exercise bike to enhance your workout experience. By following these instructions, you will learn the importance of adjusting the seat for optimal comfort and efficiency, which can lead to improved performance and a reduced risk of injury. Proper seat positioning is essential for achieving the best results during your cycling sessions, ensuring that you can focus on your fitness goals effectively.

Gather Your Tools
Gather any necessary tools before adjusting your seat. Check your Schwinn model’s specifications to determine which tools you’ll need, as different models may require different equipment. Look for an adjustable wrench or an Allen key, as these are commonly used for seat adjustments. If you’re unsure, consult your bike’s manual or look up the specifications online for your particular model.
Prepare your workspace by ensuring you have ample room to move around your bike. Lay out your tools where they are easily accessible, so you can grab them quickly while working. Keep a clean cloth nearby to wipe off any dirt or grease that may have accumulated on the seat post or the frame during your adjustment process. This will ensure a smooth and efficient adjustment journey.


Locate the Seat Adjustment Mechanism
Locate the seat adjustment mechanism by sliding your hand beneath the seat or checking the back of the seat post. Feel for a knob, lever, or quick-release clamp that allows you to modify the seat’s height and angle.
- If you find a knob, twist it counterclockwise to loosen the seat, then adjust the height before turning it clockwise to secure it in place.
- If there’s a lever, lift it, adjust the seat, and release it to lock the position.
- For a quick-release clamp, pull the handle outward to unlock, make your adjustments, and push the handle back in to secure the seat.
Familiarize yourself with the mechanism’s functionality, noting how each type operates. Practice adjusting the seat a few times to ensure you can do it smoothly and confidently.
Adjust the Seat Height
- Stand next to your bike and locate the seat adjustment mechanism. This could be a quick-release lever or a bolt, depending on your bike model.
- Loosen the mechanism just enough to allow for movement.
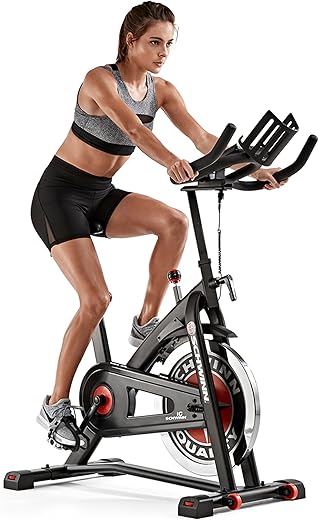
- Sit on the bike with your feet on the pedals and one pedal at its lowest point.
- Observe your knee position. Your knee should be slightly bent, not fully extended, when the pedal is at its lowest point. This ensures that your leg has a comfortable range of motion during pedaling, which helps prevent strain on your knees.
- If your knee is locked or too straight, raise the seat by adjusting the mechanism.
- Conversely, if your knee is too bent, lower the seat.
- Once you find the perfect height, tighten the adjustment mechanism securely to ensure the seat remains in place as you ride.
- Stand next to the bike again, and give the seat a gentle shake to confirm it is secure.
Set the Seat Depth
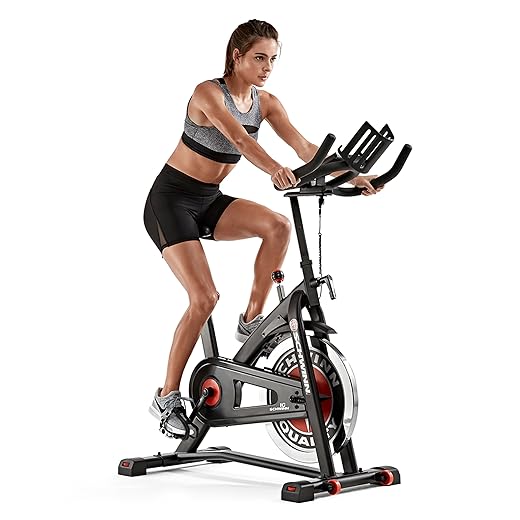
Sit on the bike and place your feet on the pedals. Rotate the pedals until one is in the horizontal position, with the pedal at the 3 o’clock point. Look down at your knee and ensure that it aligns directly above the pedal axle. If your knee is too far forward or too far back, adjust the seat depth accordingly.
Slide the seat forward or backward as needed. Tighten the seat clamp securely after making the adjustment. Get back on the bike and repeat the process to check the alignment. Make small adjustments until you achieve the optimal position where your knee is directly above the pedal axle during the horizontal pedal position.
Check the Seat Angle
Ensure the seat is level or slightly tilted forward. Adjust the seat until it feels comfortable, distributing your weight evenly across the surface. A level seat provides a stable base, reducing the risk of discomfort during long periods of sitting.
Tilt the seat slightly forward if you prefer better support for your lower back. This forward angle encourages proper posture and helps maintain the natural curve of your spine. Test the angle by sitting down and paying attention to how your back feels; adjust further if necessary to achieve optimal comfort.
Test Ride and Make Final Adjustments
Hop on the bike and take a short ride around your neighborhood or a safe area. Focus on how the bike feels as you pedal. Ensure your legs have a full range of motion without any strain. If you feel cramped or overextended, dismount and make adjustments to the seat height or depth.
Raise or lower the seat depending on your needs, aiming for a position where your legs are slightly bent at the bottom of the pedal stroke. Adjust the seat depth so you can maintain a straight line from your knee to your ankle when the pedal is at the 3 o’clock position. After making these tweaks, get back on the bike and take another short ride. Repeat the process as necessary until you achieve the perfect fit for comfort and efficiency.
Achieve Optimal Comfort and Efficiency
In conclusion, taking the time to properly position your seat on your Schwinn exercise bike is essential for maximizing your workouts. By following the steps outlined in this guide, you can create a comfortable and efficient riding experience tailored to your body. Remember to regularly check and adjust your seat as needed, ensuring that you stay comfortable and engaged during each session. Happy cycling!
Essential Gear Checklist


I debated whether the seat height adjustment actually matters. I tend to just hop on and ride, but I guess it makes a difference after all. Anyone else just wing it?
It’s easy to overlook the adjustments, but even small changes can lead to a better riding experience! You might be surprised at how much a little tweak can improve your ride.
I’m glad to hear that adjusting the seat angle made a difference for you! Comfort is key when cycling, especially for longer workouts. Keep pedaling!
Could you write something about how to maintain the Schwinn bike after using it? Like cleaning tips or what to check regularly? That would be super helpful!
Absolutely! Maintenance is crucial for keeping your bike in top shape. I’ll consider writing a guide on that soon. Thanks for the suggestion!
After following this guide, I finally got my Schwinn bike set up right! I used to have back pain after riding, but now it’s all good. Just wanted to say thanks—this really helped!
That’s awesome to hear! It’s great to know the guide made a positive impact on your riding experience. Keep enjoying your workouts!
I had trouble with the seat height adjustment. It kept slipping back down after I tightened it. Any tips on how to fix that?
If the seat is slipping, check to make sure the adjustment mechanism is fully tightened. Sometimes it helps to clean the post and the inside of the seat tube to ensure a snug fit. Let me know if that works!
For the seat depth adjustment, how do you know when it’s just right? Is there a specific rule of thumb to follow?
A good rule of thumb is to have a slight bend in your knee when the pedals are at their lowest point. You should feel comfortable but not over-extended. Experiment a bit, and you’ll find your sweet spot!
I actually modified the seat depth step a bit. I have longer legs, so I adjusted it a little further than suggested. It felt more natural for me. Just wanted to share that in case someone else has the same leg length issue!
Great insight! Adjusting the seat depth to your personal comfort level is always important. Everyone’s body is different, and finding what works best for you is key.
I found the step about checking the seat angle super helpful! I never thought about how that could affect my ride. After adjusting it, I felt way more comfortable, especially during longer sessions. Thanks for the tip!
Do you have any advanced tips for getting the best out of the Schwinn bike? Like specific workouts to do once my seat is set up right?
Definitely! Once you’re comfortable, consider interval training or adding resistance for strength building. Let me know if you want more detailed workout ideas!